Advanced
The Advanced area is a more complex structure.
In all other options, images from the target video start at the top and descend to the bottom. Proportions are created based only on the left and right areas.
For example, at 38%, the 31% areas to the left and right of the video are ignored and do not appear in the recorded mp4 file.
The advanced option allows us to intervene in the entire target video.
We can save any point, frame we wish.
If the Advanced option is selected, two ``Custom Area Type‘’ named Percent and Pixel are created.
Custom Area Type: Percent
This is where we select the part we want to capture from the target video with percentage expressions.
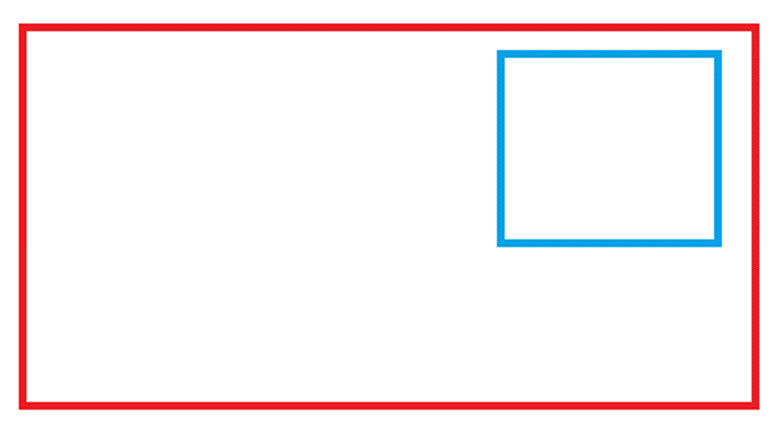
The biggest benefit is that it eliminates the need to calculate resolution.
As it is known, the resolution of each video can be different from each other. Therefore, especially when working with a large number of different target videos, working on ‘fixed values’ may cause problems.
In order to minimise these problems, using percentage expressions will provide more accurate results.
When the percentage option is selected, the Custom Area Percent option appears.
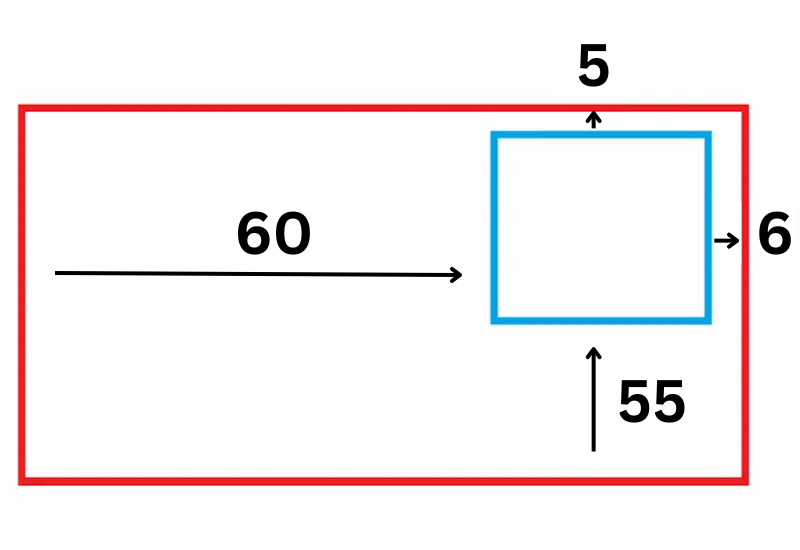
The order here is : Top, Bottom, Left, Right.
We write our percentages from the top, bottom, left and right according to the area we want to select and the remaining part is the part we will save.
Example : 5,55,60,6
Custom Area Type: Pixel
Allows to select the area to be selected from the target video with pixels.
When ticked, the Advanced Area - Pixel option appears on the screen.
Here, Width, Height, X and Y coordinates must be entered sort of.
The entered width and height values indicate the width and height of the area to be selected in the target video. X and Y are the coordinates where this area is located.
Example
We can use Paint to explain the Pixel property through the image above:
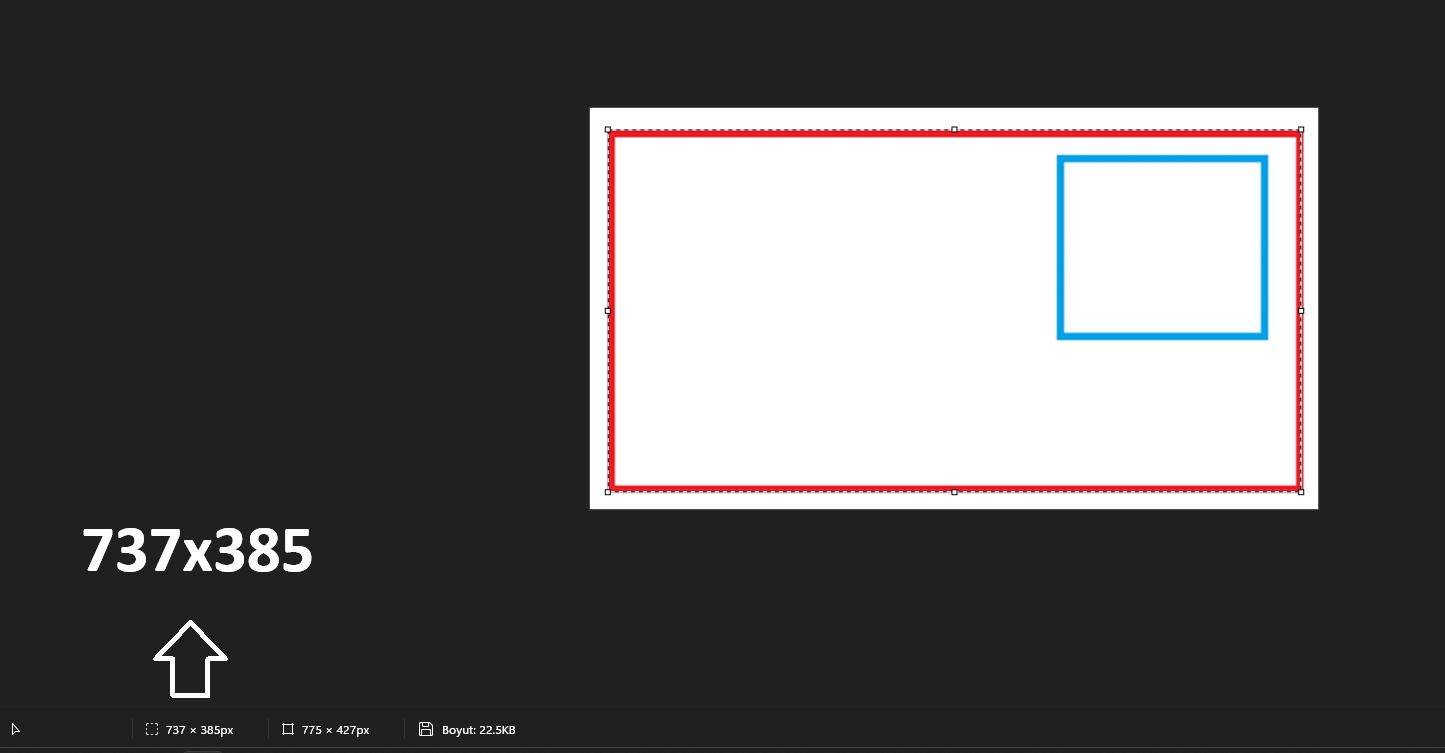
To find the resolution values (video resolution) of the red frame, we can access the resolution of this area when we select the relevant area using the ‘Select’ feature of Paint.
The resolution of our video that we want to select a special area is 737x385.
The resolution of the blue area we want to select in the video is 223x192.
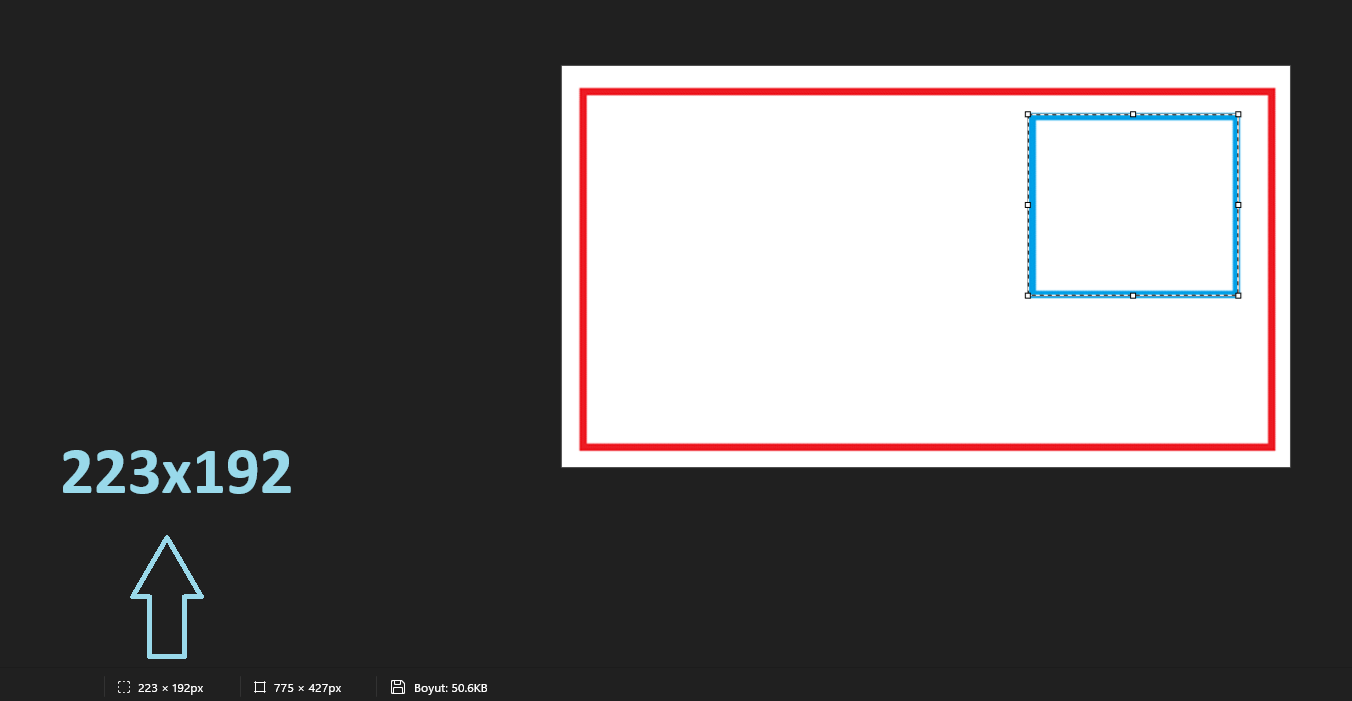
That is, in order to be able to select the relevant area in an image with a resolution of 737x385, our resolution setting must be 223x192.
After determining our resolution setting, we need to determine the X and Y coordinates of this resolution.
In this case, in order to determine the location, we need to move the mouse to the starting point of the area we want to select.
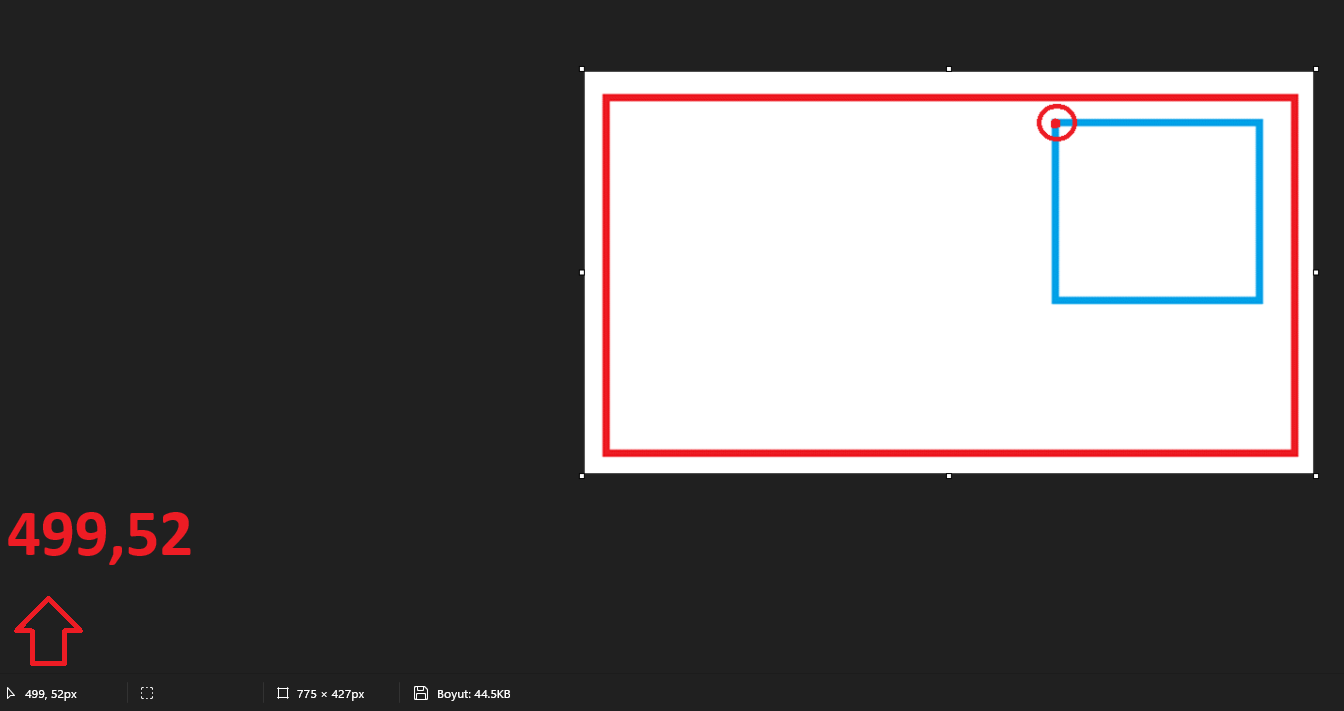
When the mouse is moved to the location indicated by the red dot, we can see from the bottom left that the X and Y values of the relevant location are 499,52.
The first value is X and the second value is Y coordinate.
In this case;
X coordinate : 499
Y coordinate : 52
becomes.
In the last case, since we have both resolution and X and Y coordinates, we can enter these values into the system.
The values we need to define in our system will be as follows respectively:
223,192,499,52
In case the resolution of the target content is 737x385, if the above data is defined in the system, the relevant area will be selected and only the image of this area will appear in the produced video.
📺 Tutorials
▶️ Custom Area Type: Percent
▶️ Custom Area Type: Pixel